Your First Widget
Build, style, and publish a lead-capture widget end to end. This walkthrough creates a simple email + phone opt-in that pushes subscribers to Iterable and fires a Journey trigger.
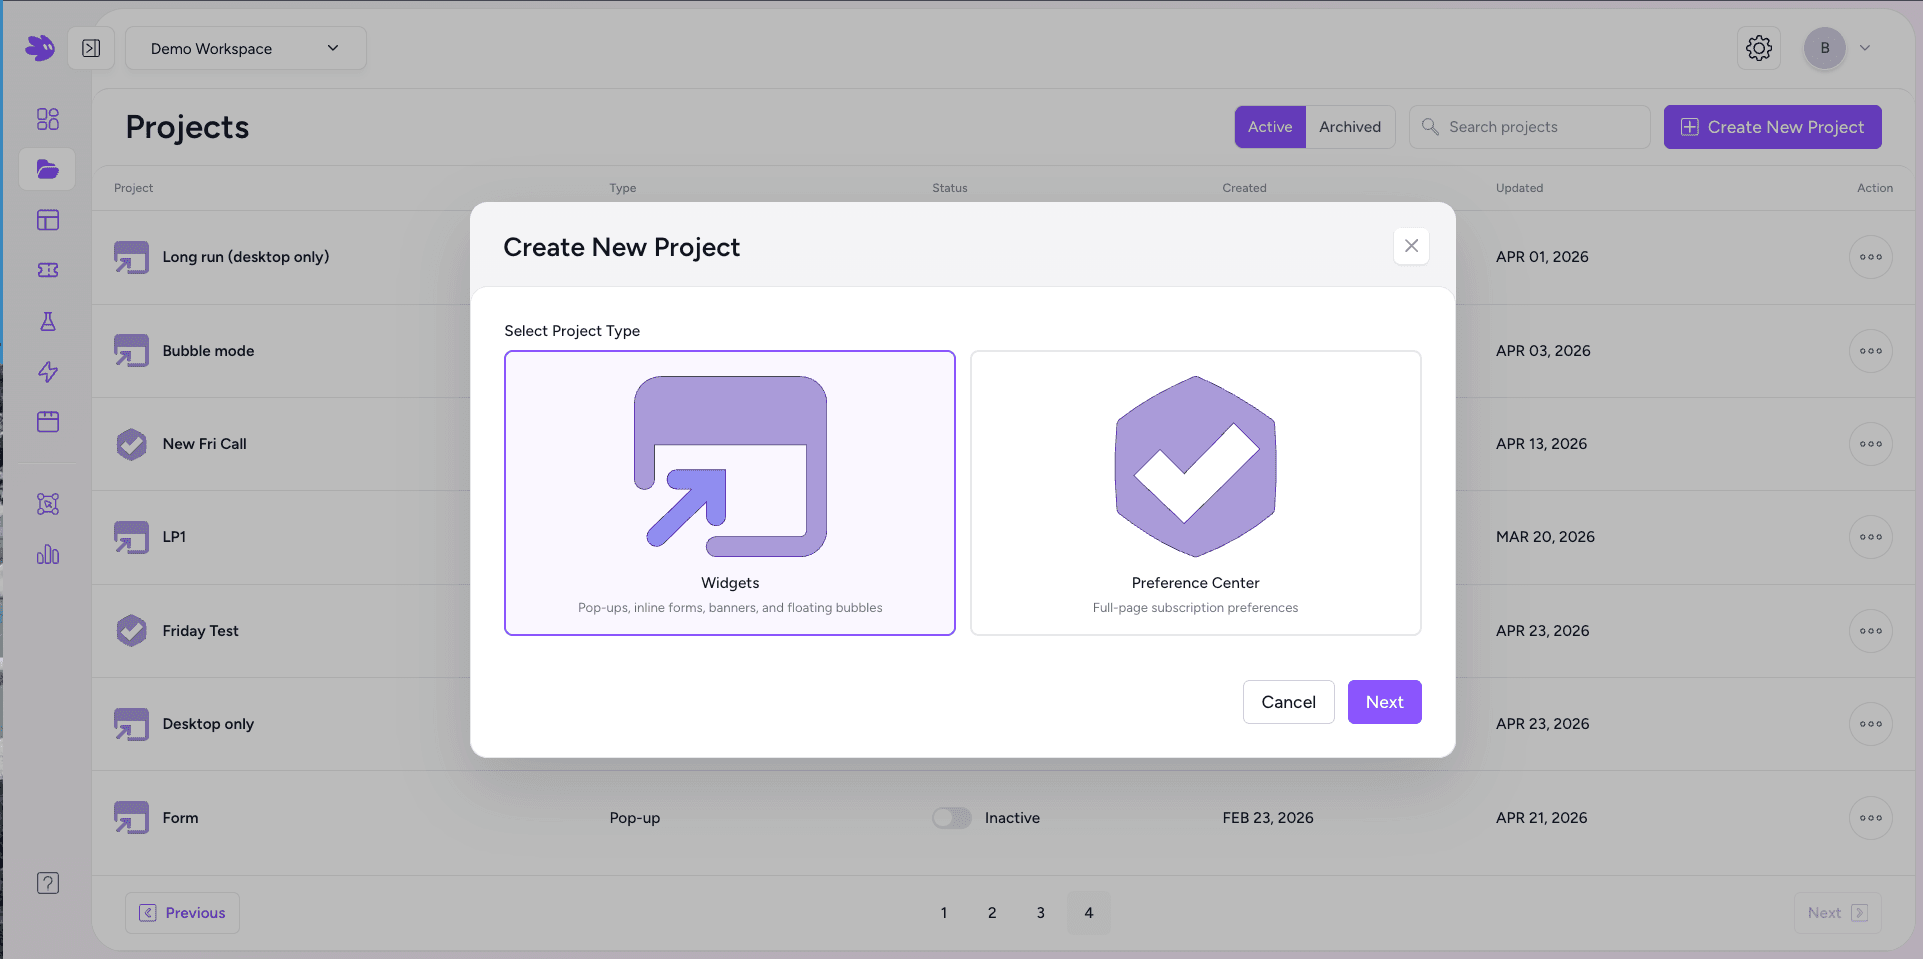
Create a new project
From the Projects page, click Create New Project in the top right. A two-step modal appears: first name the project, then choose a template.
Name it something descriptive — Summer Newsletter Signup, for example. This name appears in your project list and as the label in Analytics.
Pick a template
Choose Widgets to build pop-ups, inline forms, banners, and floating bubbles — or Preference Center for a full-page subscription preferences flow. Click Next to open the editor.
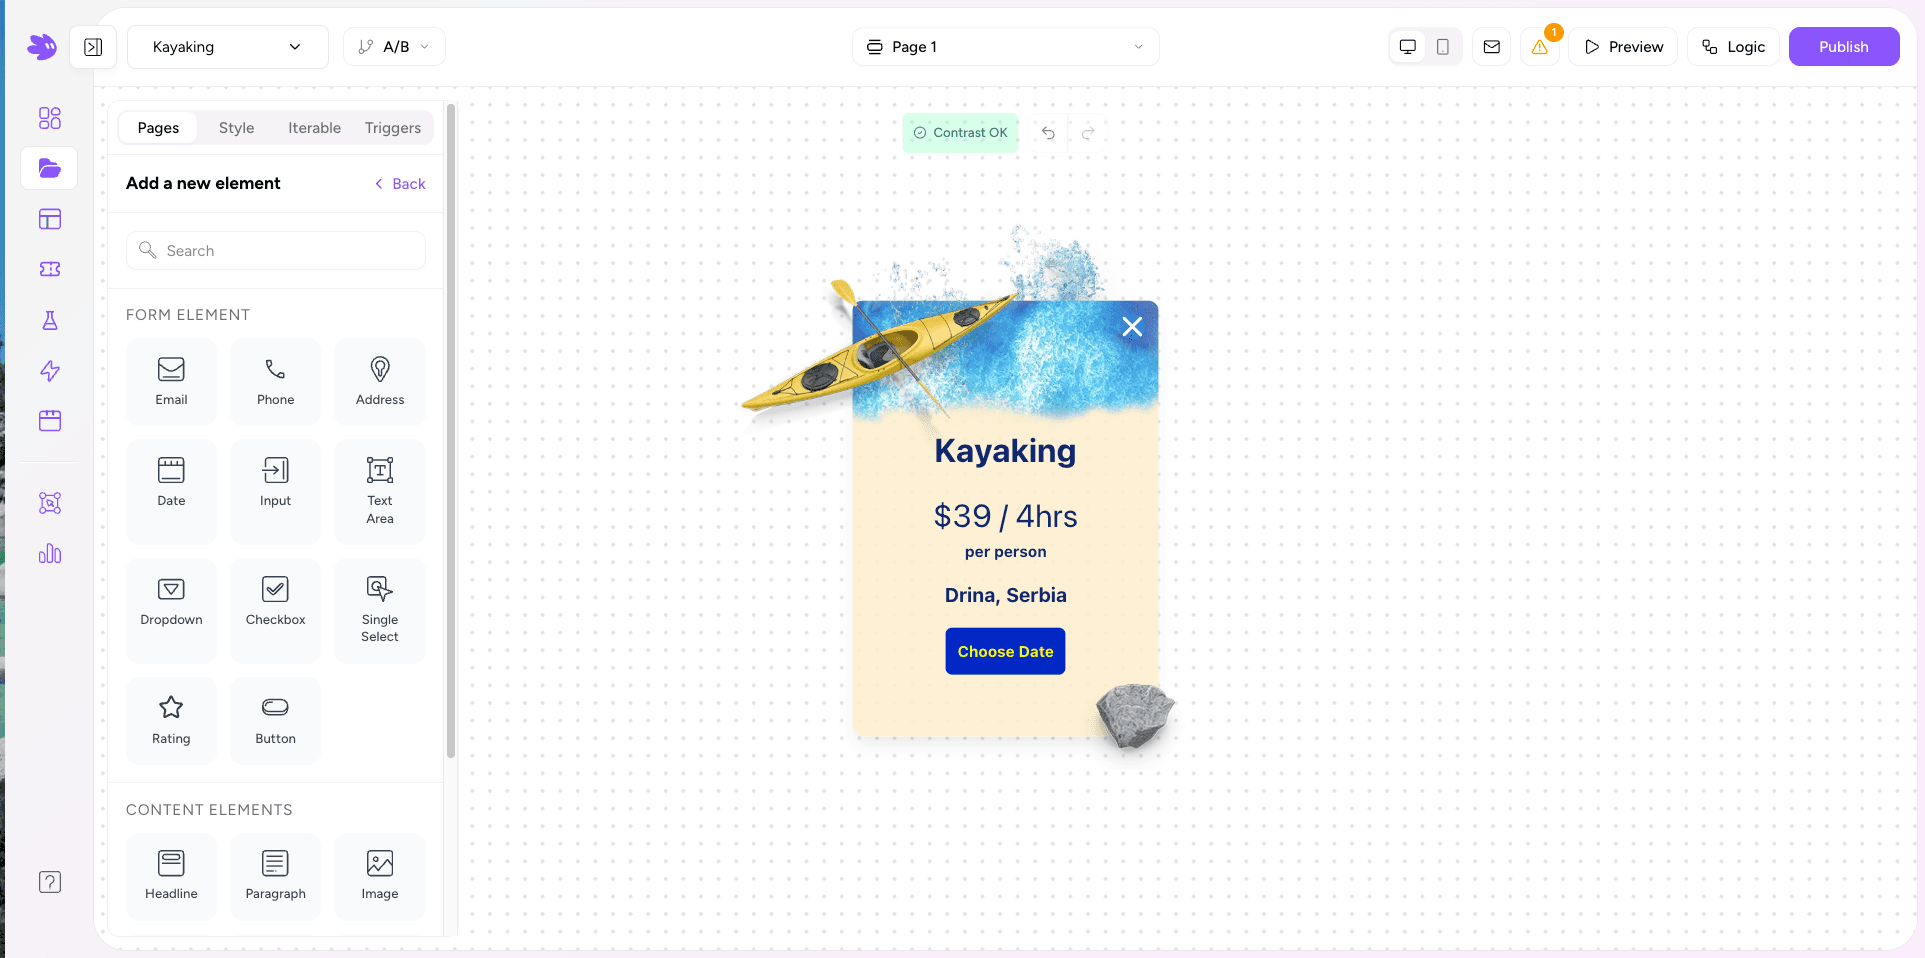
Add elements
In the editor, open the Pages tab and click + Add Element. The element picker shows all available inputs and content blocks. For a basic opt-in, add:
- Email — set Field Name to email. This is the Iterable user identity key.
- Phone — set Field Name to phoneNumber.
- Button— label it "Subscribe".
Style the widget
Switch to the Style tab. Set Display Mode to Popup, Inline, or Banner, then adjust card colors, border radius, and padding. The live canvas on the right updates in real time.
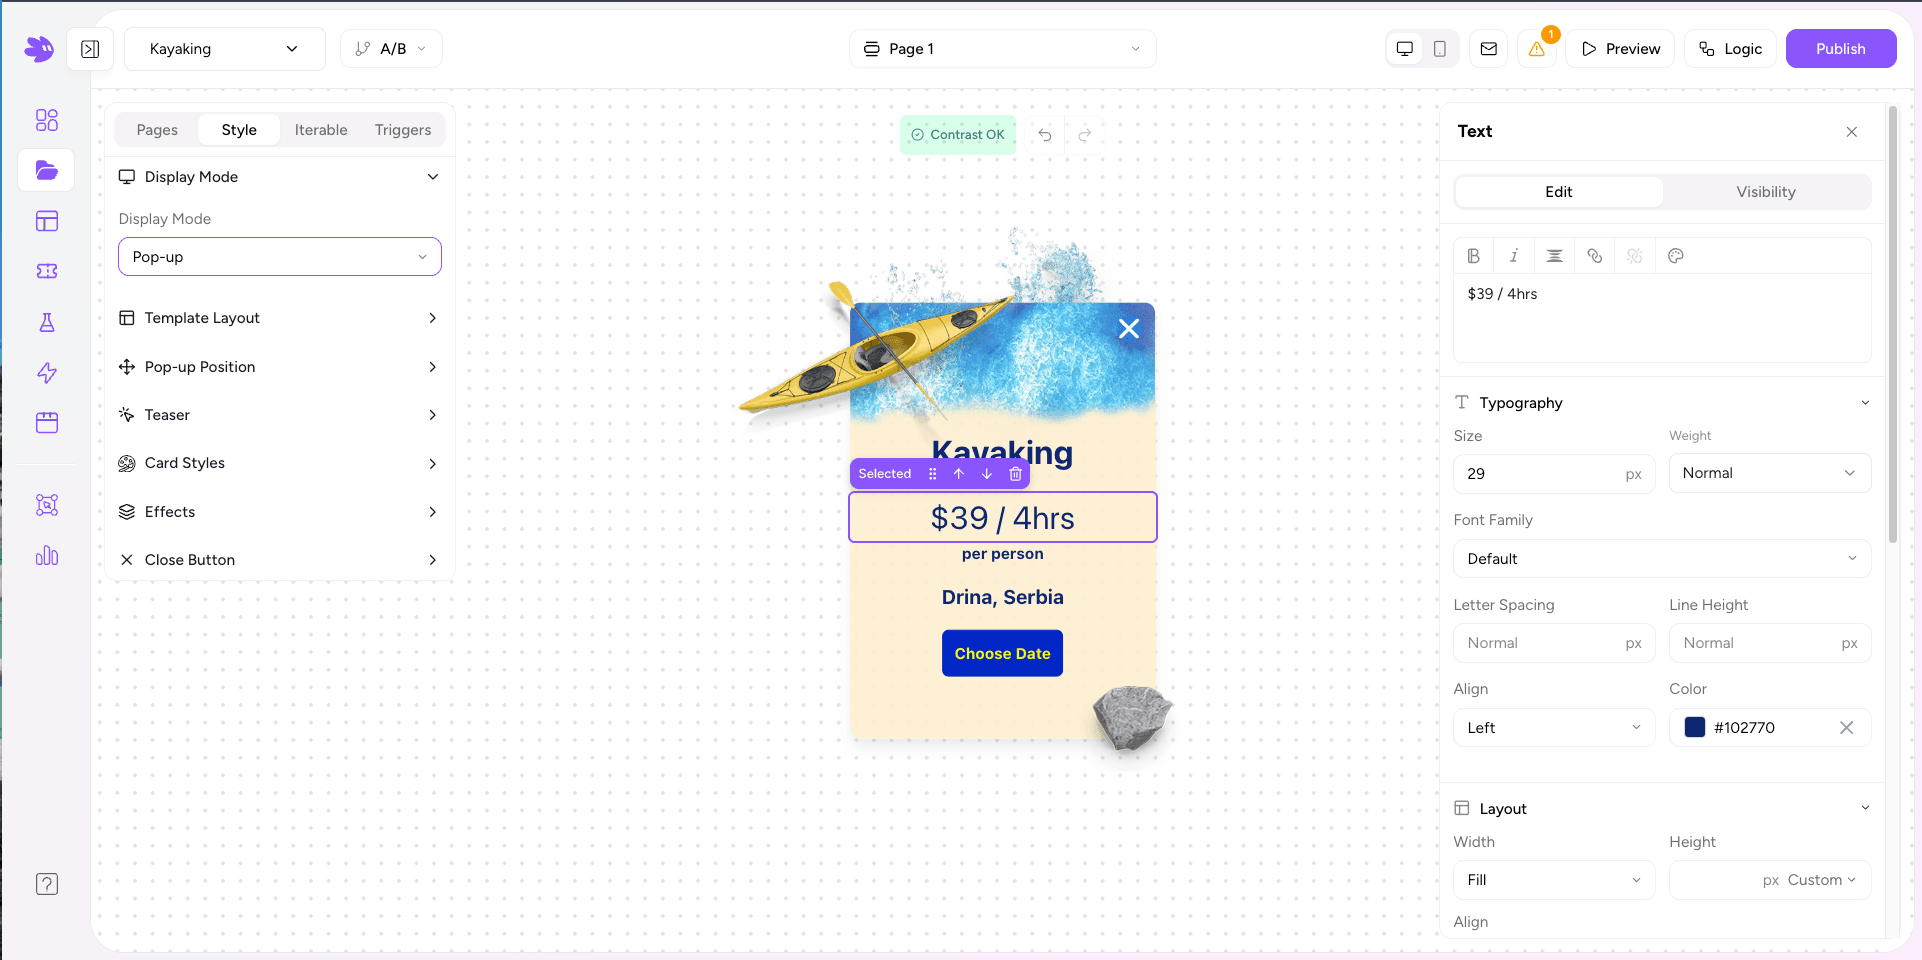
The Style tab also shows your embed snippet. Copy the <div data-jule-project="..."> tag — you'll need it in step 6.
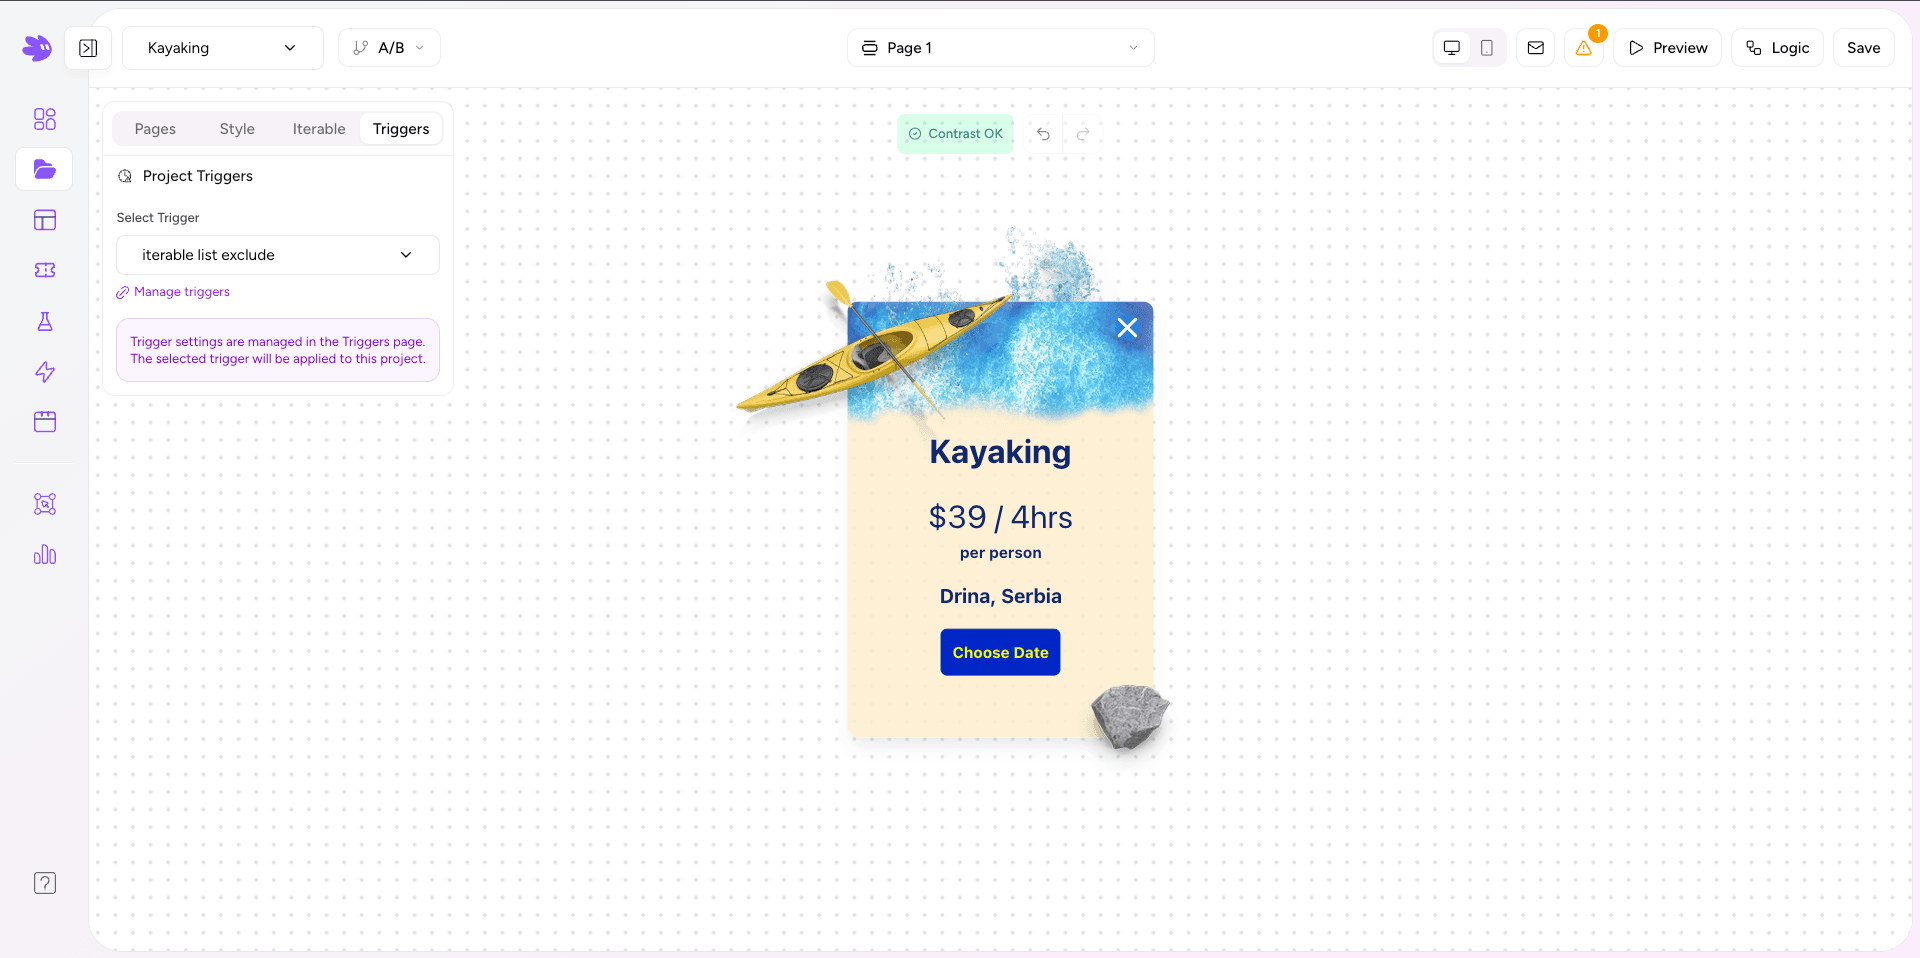
Set a display trigger
Switch to the Triggers tab. Select a trigger from the dropdown — for a newsletter pop-up, Exit Intent or Time Delay (5s) are good starting points. Click Manage Triggers to create a new one if needed.
Publish
Click Publishin the top right. Paste the embed snippet from step 4 into your site's HTML. On the next page load, the widget renders and starts syncing submissions to Iterable.